

Coaching youth baseball in Texas is more than just teaching kids to hit curveballs. It’s about keeping them strong, fast, and safe when it’s really hot. The challenge is huge.
This isn’t your grandfather’s baseball training. We’re dealing with a fine line. We want to improve their skills but also keep them safe from heat exhaustion. You can’t be explosive if you’re too tired.
Every parent and coach struggles with this. How do we build the strength and speed young players need in the heat? It’s not just about winning. It’s about keeping them safe. Whether you are managing athletes in the sweltering heat, or exploring online sports betting apps ranked to find the best platforms, preparation and understanding the rules of the game are essential for success.
Knowing how to manage the heat is key. It’s about training in a way that’s smart for the Texas summer. We need a better plan than just telling kids to drink water and be tough.
Safety first Texas climate heat index thresholds and hydration protocols
If you think heat management is optional in Texas youth baseball, I’ve got oceanfront property in Lubbock to sell you. Before we get anywhere near discussing squat depth or sprint mechanics, we need to talk about the elephant in the dugout: Texas heat will absolutely destroy unprepared young athletes. This isn’t hyperbole. It’s physiology.
Youth athletes face a brutal reality that most coaches overlook. Their thermoregulatory systems aren’t fully developed yet. They produce more metabolic heat per kilogram of body weight than adults. They sweat less efficiently. And they’re often too focused on impressing coaches to notice they’re overheating until it’s too late.
That’s why implementing youth athlete safety protocols isn’t just good practice—it’s non-negotiable. We’re going to establish a framework that treats heat stress with the same rigor you’d apply to pitch counts or concussion protocols.
The foundation of any solid safety system starts with heat index monitoring. Not the temperature on your weather app. The actual heat index—which combines air temperature and relative humidity to tell you what it actually feels like outside. Because 95°F at 30% humidity and 95°F at 70% humidity are two completely different animals.
Texas organizations like the UIL have established clear guidelines for outdoor athletics. The 2025-2026 heat stress guidelines provide specific thresholds that should inform every training decision you make. We’re going to build on that foundation with sport-specific modifications for baseball training.
Here’s your decision matrix for heat index thresholds:
| Heat Index Range | Training Modifications | Hydration Protocol | Session Duration |
|---|---|---|---|
| Below 90°F | Normal training with standard breaks | Water breaks every 20 minutes | Full 90-minute sessions |
| 90–99°F | Reduce intensity, increase shade time | Water breaks every 15 minutes, electrolytes available | Maximum 75 minutes |
| 100–104°F | Move to early morning or indoor facility | Mandatory water breaks every 10 minutes with electrolyte rotation | Maximum 60 minutes |
| 105°F and above | Cancel outdoor training entirely | Pre-hydration focus and recovery only | Indoor alternatives only |
Now let’s talk about the hydration plan that goes beyond “drink when you’re thirsty.” By the time a young athlete feels thirsty, they’re already operating at a performance deficit. Thirst is a lagging indicator, not a leading one.
Your pre-training hydration strategy should start before the athlete steps on the field. Two hours before training begins, athletes should consume 16–20 ounces of water. This gives the body time to absorb and distribute fluids properly.
Thirty minutes before training, another 8–10 ounces. This tops off the tank without causing stomach discomfort during movement.
During training sessions, fluid intake should match sweat rate. For most youth athletes in Texas heat, that’s 4–8 ounces every 15–20 minutes. Yes, this means frequent water breaks. No, this is not negotiable.
Here’s where electrolyte timing becomes critical. Plain water is fine for sessions under 60 minutes. Beyond that threshold—or when heat index exceeds 95°F—electrolyte replacement becomes essential. We’re talking sodium, potassium, and magnesium, not just sugar water with food coloring.
The urine color chart is your friend here. I know it’s awkward. Do it any way. Athletes should be checking their hydration status before and after training. Pale yellow is the goal. If their urine looks like apple juice, they’re already dehydrated.
Post-training rehydration follows a simple formula: drink 20–24 ounces of fluid for every pound lost during training. This requires weighing athletes before and after sessions—another step that separates serious programs from recreational chaos.
Acclimatization deserves its own attention. That kid who just moved from Minnesota isn’t ready for August in Houston on day one. Heat acclimatization takes 10–14 days of gradual exposure. Start with 50% normal training duration and intensity, then increase by 10–15% every two days.
This isn’t coddling. It’s science. The body needs time to increase blood plasma volume, improve sweat response, and enhance cardiovascular efficiency in heat. Rush this process, and you’re rolling dice with heat illness.
Recognition of early warning signs should be drilled into every coach and parent. Heat exhaustion symptoms include heavy sweating, weakness, cold or clammy skin, fast weak pulse, nausea, and fainting. These require immediate action: move to shade, remove excess clothing, cool with wet towels, and provide fluids if the athlete is conscious.
Heat stroke is the emergency. Hot dry skin, rapid strong pulse, confusion, and possible unconsciousness mean you call 911 immediately. This is not a “let’s see how they do” situation.
The safety protocols we’ve outlined here aren’t suggestions for overly cautious parents. They’re the baseline standards that should govern every outdoor training session in Texas. Because what’s the point of developing a 90-mph fastball if the kid collapses before reaching the mound?
Treat heat management with the same obsessive attention you give to mechanics. Monitor conditions religiously. Enforce hydration schedules strictly. Respect acclimatization timelines absolutely. Your athletes’ health isn’t negotiable, and neither is this framework.
Movement screen overhead squat lunge ankle mobility and scap function
Movement screening isn’t glamorous, but it’s key to developing athletes. Before training, we must know what’s happening under the hood. Carson Ellis asks, where do movement patterns break down when tired?
This isn’t just a question. It’s a roadmap.
Systematic functional screening shows if a young athlete can handle training stress. We look for baseline competency and red flags before they become big problems.
The Overhead Squat: Your Movement Rosetta Stone
The overhead squat is like a Swiss Army knife for movement assessment. It reveals a lot with just one test.
Stand a 12-year-old in front of you, hands overhead with a PVC pipe or broomstick. Ask him to squat as deep as possible while keeping the stick overhead and heels down. What happens next tells you almost everything you need to know about his kinetic chain.
Does the stick drift forward? That means tight ankles or a weak core. Do the knees cave inward? That could mean glute weakness or poor hip control. Does the torso fold like a lawn chair? That might be due to thoracic spine mobility issues or inadequate shoulder flexion.
Each compensation pattern tells a story. Your job is to read it before the body writes a sequel called “injury.”
Lunge Patterns: Because Baseball Lives in Rotation
Baseball isn’t a symmetrical sport. You rotate, you decelerate, you explode from asymmetrical positions. A young athlete who can’t control a basic lunge has zero business generating rotational power in the batter’s box.
Test both forward lunges and reverse lunges. Watch for knee stability, hip control, and whether the torso stays upright or collapses. Add a rotational component—hand a kid a light medicine ball and ask him to rotate during the lunge.
If the movement falls apart, you’ve found your starting point. Build stability before you build speed.
Ankle Mobility: The Foundation You’re Probably Ignoring
Stiff ankles cascade into compensatory patterns faster than you can say “chronic knee pain.” Limited dorsiflexion forces the knees to travel inward, the hips to shift laterally, and the lower back to overcompensate. It’s a kinetic chain disaster waiting to happen.
The half-kneeling ankle mobility test is simple: place the big toe five inches from a wall, drive the knee forward toward the wall without lifting the heel. Can the knee touch the wall? Great. Does the heel pop up or the arch collapse? Red flag.
Address ankle restrictions with dedicated mobility work before adding load. Mobility isn’t optional—it’s the entry fee to youth baseball S&C programming.
Scapular Function: Overhead Athletes Need Healthy Shoulder Blades
Scapular dysfunction in young baseball players is so common it might as well be listed as a team requirement. But “common” doesn’t mean “acceptable.” Shoulder blades that wing out, don’t rotate properly, or lack stability become injury magnets the moment you add throwing volume or strength work.
Test scapular control with a simple push-up hold or wall slide. Do the shoulder blades stay flat against the ribcage or do they pop out like frightened wings? Can the athlete smoothly elevate his arms overhead without shrugging or compensating?
If the scap doesn’t move right, the shoulder won’t either. And in baseball, shoulder problems end careers before they start.
Assessment Battery: What to Test and Why
Here’s a practical functional screening battery you can run in 15 minutes with minimal equipment. No fancy certifications required—just eyes, a PVC pipe, and the willingness to actually look at what’s happening.
| Assessment Test | What It Reveals | Common Compensations | Red Flag Threshold |
|---|---|---|---|
| Overhead Squat | Ankle mobility, hip function, thoracic extension, shoulder flexion | Forward lean, knee valgus, heels lifting, arms falling forward | Cannot reach parallel depth with arms overhead |
| Forward/Reverse Lunge | Single-leg stability, hip control, knee tracking | Knee cave, torso lean, loss of balance | Knee travels medially past big toe |
| Ankle Dorsiflexion (5-inch wall test) | Ankle joint mobility, Achilles flexibility | Heel lift, arch collapse, knee deviation | Knee cannot touch wall from 5 inches |
| Scapular Wall Slide | Shoulder blade control, rotator cuff function, thoracic mobility | Scapular winging, shoulder shrug, loss of contact with wall | Cannot maintain scapular position through full range |
This isn’t about finding reasons to disqualify kids from training. It’s about identifying where the system breaks down so you can fix it intelligently. Ellis emphasizes understanding “where energy leaks happen”—these tests show you exactly where those leaks exist.
From Assessment to Action
Once you’ve screened movement quality, you have three categories: cleared for training, needs corrective work before load, and requires professional evaluation. Most kids will land in the middle category—they move adequately but have obvious limitations that need addressing.
That middle group gets dedicated mobility and stability work before progressing to loaded strength exercises. Think of it as earning the right to train hard. You wouldn’t hand car keys to someone who failed the vision test. Don’t hand barbells to athletes who can’t pass basic movement assessment standards.
The goal isn’t perfection. It’s establishing enough movement competency that adding speed or load doesn’t create injury risk. Screen, address limitations, then build strength and speed on a foundation that won’t crumble.
Because finding out your athlete has dysfunctional movement patterns after he’s hurt is like discovering the parachute doesn’t work after you’ve jumped. Technically you learned something, but the lesson comes at a price nobody wants to pay.
Warm‑up RAMP raise activate mobilize potentiate 10 minutes script
The ten minutes before practice starts is often wasted. Kids jog in circles while coaches set up cones. Some arm swings and static stretches happen, but they’re outdated.
Traditional warm-ups don’t really warm up the body. They’re more like rituals than real preparation. The body needs a sequence, not a ceremony.
Enter the RAMP protocol—four letters that represent real sports science. Raise, Activate, Mobilize, Potentiate. Each step prepares the body for explosive baseball movements in under ten minutes.
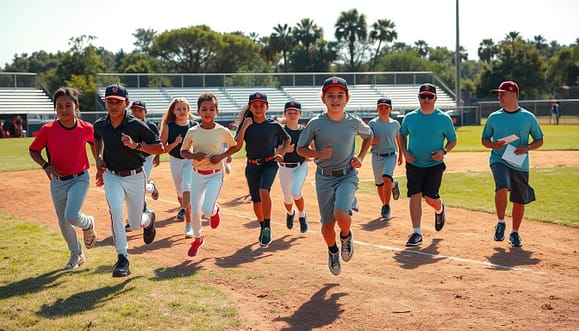
In Texas heat, a proper dynamic warm-up is key. It raises core temperature efficiently without overheating kids. No long jogging sessions in the hot sun. Just focused movements that prepare the body.
Here’s the framework:
- Raise: Gradually increase heart rate and body temperature through low-intensity movement
- Activate: Wake up dormant muscle groups critical for baseball performance
- Mobilize: Target sport-specific ranges of motion at joints that matter
- Potentiate: Prime the nervous system through explosive movements at submaximal intensity
The Raise phase takes three minutes. Side shuffles, backpedals, cariocas, high knees, butt kicks. These movements increase core temperature and get athletes ready to train.
Then Activate for two minutes. Glute bridges, scapular wall slides, dead bugs, band pull-aparts. These exercises wake up muscles that stabilize the body before intense movements.
The Mobilize phase requires three minutes of focused range-of-motion work. Leg swings, thoracic rotation, and ankle rockers. This isn’t yoga; it’s about accessing the movement ranges baseball demands.
Lastly, Potentiate uses two minutes of explosiveness. Med ball chest passes, broad jumps, and starts. The nervous system needs to rehearse producing force quickly before game speed.
| Phase | Duration | Purpose | Example Drills |
|---|---|---|---|
| Raise | 3 minutes | Elevate heart rate and temperature | Side shuffles, backpedals, skips |
| Activate | 2 minutes | Neural engagement of key stabilizers | Glute bridges, scap slides, dead bugs |
| Mobilize | 3 minutes | Sport-specific range of motion | Leg swings, spidermans, ankle rockers |
| Potentiate | 2 minutes | Neurological priming for explosiveness | Med ball throws, broad jumps, starts |
This baseball warm-up routine isn’t new science. It’s just smart preparation done right. The magic is in the sequence, building readiness step by step.
Does it require more thought than “take two laps”? Absolutely. Does it prepare athletes to actually train instead of just occupying space on a field? Also yes. In Texas heat, those ten minutes are key to performance.
The entire RAMP protocol fits neatly into the heat window before core temperatures spike. No wasted motion, no theatrical stretching, no inherited nonsense. It’s just smart preparation that works with how bodies function.
Revolutionary? Not in 2025. Just competent, which in youth baseball sometimes feels like the same thing.
Speed mechanics wall drills wickets flying 10s timing gates
Most coaches think speed is a gift from the gods. But it’s actually a teachable skill. In Texas heat, you have only 15-20 minutes to work before getting tired.
Systematic speed development makes a big difference. It’s like refining skills in hitting-pitching clinics and camps. Speed needs a focused approach too.
Let’s look at how to build speed from the basics to the fastest. Each drill has its own goal and quality standards.
Wall Drills: The Foundation Nobody Wants to Do
Wall drills are key in sprint mechanics learning. They teach body position and angles without running. Kids learn to accelerate with a forward lean and strong knee drive.
These drills are controlled. Athletes can focus on one thing at a time, without worrying about falling.
Place athletes close to a wall or fence. They lean forward with hands on the wall. Then, practice marching mechanics, focusing on quick foot recovery.
Wickets: Teaching Rhythm and Cadence
Wickets help athletes learn rhythm and cadence in the acceleration phase. They’re not about jumping. It’s about finding the right rhythm and teaching the nervous system.
Spacing is key. Start with 2-foot spacing for the first three wickets. Then, increase to 3.5 feet by wicket ten. This mirrors natural stride length increase.
| Wicket Position | Spacing (feet) | Technical Focus | Common Error |
|---|---|---|---|
| 1-3 | 2.0 | Quick ground contact | Reaching forward |
| 4-6 | 2.5 | Shin angle progression | Standing too upright |
| 7-10 | 3.0-3.5 | Transition to upright | Overstriding |
The goal is technical skill, not speed. Training should be purposeful, not ego-driven.
Flying 10s: Max Velocity Without the Metabolic Cost
Flying 10s are fun. They’re short build-ups into 10-yard sprints. Athletes accelerate for 20 yards, then sprint all-out for 10 yards before slowing down.
This drill boosts top-end speed without the metabolic cost of longer sprints. It’s great when it’s hot. You get quality speed work with faster recovery.
Tell athletes to “relax into speed” during the max effort zone. Tension slows you down. The best sprint mechanics look effortless, not strained.
Timing Gates: Because “He Looks Fast” Isn’t Data
Timing gates give real feedback on acceleration training progress. Set gates at 10 yards and 20 yards to measure start and sustained speed.
Track times weekly, not daily. Look for trends over time, not daily changes that show fatigue and hydration.
Here’s how to tie everything together:
- Week 1-2: Do wall drills daily, wickets twice weekly, and establish baseline times
- Week 3-4: Reduce wall drill volume, increase wicket complexity, introduce flying 10s
- Week 5-6: Keep wall drills, wickets for warm-up, flying 10s as main work, retest timing gates
Speed is key in baseball, but only if you can do it repeatedly without getting tired. It needs mechanics, not just effort. It needs teaching movement literacy before chasing numbers.
And in Texas heat? You need to be very efficient in every training minute you have.
Strength menu hinge squat push pull carry anti‑rotation med ball work
Here’s the truth about youth strength training that most rec-league conversations miss: properly designed programs don’t break young athletes—they build them. The problem isn’t lifting weights or developing strength. It’s adults treating twelve-year-olds like college linebackers or fragile dolls.
We focus on movement patterns instead of muscle groups. This approach teaches young athletes how to move their bodies. It helps them throw harder, run faster, and stay healthy.
The foundation starts with understanding six essential patterns. Each pattern builds specific athletic qualities. These qualities support baseball performance and keep young athletes healthy.
| Movement Pattern | Primary Purpose | Baseball Application | Example Exercises |
|---|---|---|---|
| Hinge | Posterior chain power and explosive hip extension | Rotational velocity and ground force production | Trap bar deadlift, RDL, kettlebell swing |
| Squat | Lower body strength and force absorption | Change of direction and deceleration control | Goblet squat, split squat, lateral squat |
| Push/Pull | Structural balance and shoulder health | Arm care and throwing durability | Push-up variations, inverted rows, band pulls |
| Carry/Anti-Rotation | Core stability and rotary control | Spine protection during explosive rotation | Farmer carries, Pallof press, chops and lifts |
Hinge patterns build the back muscles that power rotation. Deadlifts and kettlebell swings teach athletes to load their back hips before rotating. This helps with pitching and hitting.
Squats build lower body strength and teach athletes to absorb force safely. Goblet squats focus on proper depth and torso position. Split squats and lateral squats improve single-leg strength and stability.
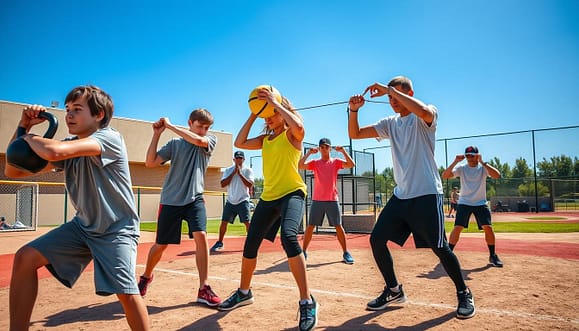
Push and pull exercises keep shoulders healthy through thousands of throws. We do twice as many pulling exercises as pushing. This builds strong shoulders that support arm health.
Carries are simple but very effective. They build core strength that helps with rotation. Overhead carries also improve shoulder stability.
Anti-rotation work protects the spine during explosive movements. Pallof presses and medicine ball exercises teach athletes to resist rotation. This helps with safe, powerful rotation.
Medicine ball training is key in youth strength training. It teaches athletes to produce and absorb force at high speeds. This develops explosive qualities needed in baseball.
The philosophy behind our training is important. We’re not making powerlifters who play baseball. We’re making baseball players who are strong, mobile, and explosive.
Load selection is based on mastering the pattern before adding weight. Athletes need to perform a bodyweight squat correctly before adding weight. Progress comes from improving movement quality, then volume, then intensity.
This approach makes athletes resilient and powerful. They move well, generate power efficiently, and are built to handle baseball’s demands. The goal is optimal strength that supports movement quality and long-term development.
In‑season micro‑dose 15–20 minutes two to three days per week
Here’s a truth about youth baseball: it can undo hard work faster than you can say “doubleheader in August.” Athletes spend months building strength and speed. Then, games and tournaments start, leaving no time for training.
Do we give up on strength training and watch gains disappear? Or do we find a smarter way?
Micro-dosing is the answer. It means short, focused workouts that keep skills sharp without getting too tired. These sessions last 15 to 20 minutes, done two to three times a week. It’s like a maintenance dose for the body during the season.
The goal is simple but key. We’re not trying to build new skills in the season. We’re keeping the off-season gains alive.
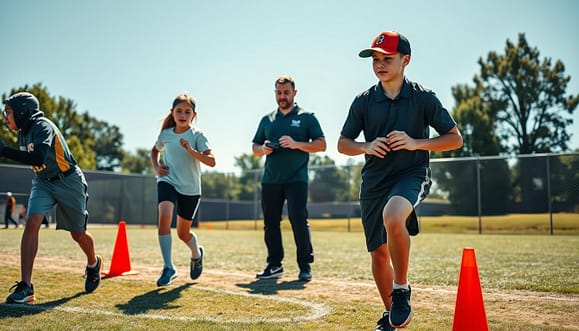
- One movement screen or mobility drill addressing individual limitations
- One primary strength pattern at moderate load
- One power or speed element to maintain explosiveness
That’s it. No need for long, tiring workouts.
Let’s see what a session looks like. Start with three minutes of mobility work, like ankle exercises for pitchers. Then, do ten minutes of a squat or hinge at moderate weight. End with five minutes of medicine ball throws or short sprints.
The workouts are short and intense. But they’re done regularly. This is where consistency matters.
Carson Ellis says growth comes from daily activities, not big pushes. This is true for in-season training too. Regular, manageable workouts beat big, one-off efforts every time.
| Day | Focus | Duration | Primary Element |
|---|---|---|---|
| Monday | Mobility + Hinge | 18 minutes | Trap bar deadlift variation |
| Wednesday | Activation + Push | 15 minutes | Push-up progression + med ball |
| Friday | Movement + Speed | 20 minutes | Squat pattern + short sprints |
This method keeps kids healthy and strong without hurting their game performance. In Texas’s heat, with packed schedules, it’s the best we can do.
This approach isn’t glamorous. It won’t make Instagram reels. But maintenance programming works because it fits the reality of youth sports. There are too many games, not enough rest, and the heat is extreme.
Perfection is not always the best. Good enough keeps athletes playing, which is what matters most.
Recovery breath sleep nutrition shade cooling towels and ice tub cautions
The truth about youth athlete development is not glamorous. It happens in bed, at dinner, and in the shade. Nobody posts about proper breathing or nine-hour sleep. Yet, these elements are key to building athletes, not just grinding them down.
Training gives stimulus, but recovery is where adaptation happens. In Texas heat, recovery is essential, not just a supplement. It’s the base of a good training program.
Breathing patterns reveal everything. Young athletes often breathe with their chests, stuck in fight-or-flight mode. Teaching them to breathe diaphragmatically changes this.
Have them lie on their backs and feel their belly rise while their chest stays steady. Practice four-count inhales and six-count exhales. This technique helps them recover better after intense training.
Sleep is key, but often ignored. Youth athletes need nine to ten hours a night. Most get six to seven, due to homework, screens, and early practices. This lack affects their growth and brain function.
Start with a cool, dark bedroom. No phones after 9 p.m. to avoid blue light. Consistent sleep times help regulate their body clock better than any supplement.
Nutrition is vital for growth, not just snacks and sports drinks. They need real food like chicken and eggs. Protein within thirty minutes after training helps muscle growth.
Carbs are important too, depending on activity levels. More carbs on training days, less on rest days. In Texas heat, hydration is critical, with 150 percent of sweat loss in rehydration.
| Recovery Element | Immediate Post-Training | Same Day Evening | Next Morning |
|---|---|---|---|
| Hydration | 16-20 oz water with sodium | Continue fluid replacement | Assess urine color for status |
| Nutrition | 20-30g protein within 30 min | Balanced meal with carbs | Protein-rich breakfast |
| Environmental | Shade and cooling towels | Cool shower, rest in AC | Assess soreness and fatigue |
| Sleep Prep | Limit screen exposure | No devices after 9 PM | Maintain consistent wake time |
Environmental recovery tools address Texas-specific challenges. Shade is key to avoid direct sun. Cooling towels and fans help lower body temperature.
Cold water immersion is not for routine recovery. It’s for emergency heat stress management. Water should be between fifty and sixty degrees for ten to fifteen minutes.
Avoid ice baths after strength sessions to support muscle growth. The cooling effect can hinder protein synthesis. Choose tools based on the situation.
Creating a recovery culture is as important as training. Neglecting recovery limits progress. Athletes who improve consistently focus on rest and nutrition.
Designing a good program is not enough. Recovery is essential for progress. Athletes who sleep well, eat right, and practice breathing patterns consistently improve.
These recovery protocols are not extras. They’re the foundation for adaptation. Without them, training can lead to breakdown, not progress.
Parent and coach roles monitoring and red flag escalation
We need to talk about something awkward. Youth baseball safety often relies on hopes and assumptions. Parents think coaches watch every kid closely. Coaches believe parents have done all the prep work.
Kids try not to show weakness in front of their teammates. They ignore dizziness and nausea to avoid looking weak. This system is great for creating emergencies.
The lack of parent coach communication leads to missed heat illness signs. We need clear roles and protocols. Not just suggestions, but requirements.
Coaches are the main monitors during activities. It’s not about being a doctor, but about watching and acting.
Look for signs of heat distress all the time. Signs include flushed skin, confusion, and loss of coordination. These symptoms don’t take time to show up.
Make sure kids take hydration breaks every 15-20 minutes in Texas heat. No exceptions. The drill’s rhythm doesn’t matter if a kid gets hurt.
Make asking for breaks normal. If kids see asking for water as weak, youth sports safety fails. Make it routine and boring.
Parent Responsibilities: Foundation and Follow-Up
Parents handle the prep and recovery that coaches don’t see. Make sure your kid is well-hydrated before practice. That means 16-20 ounces of water two hours before, not just a sip in the parking lot.
Tell coaches about any health concerns before practice. This includes medications, recent illnesses, or sleep issues. Coaches can’t watch what they don’t know about.
Watch for signs of not recovering well at home. Signs include headaches, nausea, extreme tiredness, or dark urine. These mean your kid isn’t recovering well and is at risk for the next practice.
Write down any concerning symptoms and share them with coaches. This helps prevent problems from getting worse.
Red Flag Escalation Protocols
Most programs fail when it comes to making quick decisions in emergencies. When a kid stumbles in the outfield, you can’t debate whether to call parents or 911. These decisions need to be made ahead of time, documented, and shared with everyone.
The escalation ladder has three levels based on how bad the symptoms are:
| Warning Level | Symptoms | Action Required | Communication |
|---|---|---|---|
| Early Warning | Heavy sweating, fatigue, mild thirst, normal coordination | Immediate rest in shade, hydration, activity modification | Monitor closely, inform parent at pickup |
| Moderate | Headache, dizziness, nausea, reduced sweating, coordination issues | End participation, cooling measures, continuous observation | Call parent immediately for pickup |
| Severe | Confusion, collapse, cessation of sweating, loss of consciousness, seizure | Call 911, initiate cooling protocol, maintain airway | Emergency services first, then parent notification |
| Prevention | Heat index above 100°F, recent illness, inadequate hydration | Modify intensity, increase breaks, consider postponement | Pre-session parent notification of conditions |
Notice that severe symptoms mean calling 911 before notifying parents. You’re not asking permission to call 911 when a kid collapses. You’re calling 911 while someone else calls the parents.
Is this overkill for youth baseball? Only if you’ve never seen heat illness recognition failure in real time. The shift from “I’m fine” to needing medical help can happen quickly.
These protocols only work if everyone knows them before a crisis. Print the escalation ladder. Post it at the field. Review it at the parent meeting. Make it as familiar as the batting order.
Coaches need to have the power to stop practice without debate. Parents need to know that calls for pickup are not suggestions. Kids need to know that reporting symptoms is praised, not questioned.
The truth about youth sports safety is that most programs learn the hard way. Someone gets hurt, and everyone wishes they’d acted sooner.
Avoid that learning curve. Set clear roles, enforce monitoring, and have plans for emergencies. It’s simple: just acknowledge that assumptions aren’t enough.
Equipment list bands mini‑hurdles radar cones and timers
Good coaching is key, but the right gear makes it easier. You don’t need an expensive setup. What matters is durable, versatile tools for quality training.
Here’s what’s important for a good youth baseball program.
Resistance bands are like duct tape for strength training. They’re versatile and effective. Get a pack with different tensions for various exercises. They cost about thirty bucks.
Mini-hurdles help improve speed by making it visible. Use eight to ten hurdles in two heights. They help kids see and fix their stride.
Radar guns or speed apps give real feedback. “Try harder” isn’t enough. Showing speed improvements motivates kids. Good radar units cost under two hundred dollars, and some apps are free.
Cones mark areas and help with agility. A dozen cones cost about as much as a pizza. Interval timers keep training on track with the GymBoss app.
Medicine balls help with rotational power. Foam rollers or massage balls aid in self-myofascial release. A portable sound system adds energy to training.
Don’t waste money on fancy, complicated equipment. Focus on simple, effective tools. The best results come from quality training, not fancy gear.
| Equipment Category | Specific Items | Approximate Cost | Primary Function |
|---|---|---|---|
| Resistance Tools | Band variety pack (light/medium/heavy) | $25–40 | Activation, stretching, regression options |
| Speed Development | 8–10 mini-hurdles (6″ and 12″) | $60–100 | Mechanics drills, stride development |
| Assessment | Radar gun or speed app | $0–200 | Objective performance feedback |
| Organization | Cones (12), interval timer app | $15–30 | Spatial setup, work-rest structure |
| Power Development | Medicine balls (4/6/8 lbs) | $80–120 | Rotational power, throwing patterns |
This list shows that simple beats complicated. The goal is to enable quality movement, not replace coaching. No equipment can fix bad programming or disengaged teaching.
The right tools make coaching more effective. They provide feedback, create cues, and make kids feel part of something special. This psychological aspect is key.
You can run a great youth baseball program for the cost of two tournaments. The benefits include better movement, speed, and injury prevention. This beats collecting trophies.
Six week plan PDF with progressions
Theory stops mattering when your 13-year-old shortstop shows up at 6 p.m. with his glove and Gatorade.
This training program is not just theory. It’s a field-tested blueprint.
The six-week plan follows a periodization model that works in Texas summers. Weeks one and two focus on movement quality and work capacity. You teach kids to move before making them fast.
Weeks three and four increase intensity while keeping session volume low. Weeks five and six show off what’s been built with higher speeds and heavier loads.
Each week outlines your training days. You’ll have warm-ups, main work, and cooldowns. Progressions make movements and loads get more challenging.
The plan isn’t set in stone. It’s a template. Adjust it for heat or injuries.
The PDF format is easy to use without tech. Just print and laminate it.
The best training program is the one you use, not the most complex. Consistency beats complexity every time.